7 Tips for Choosing the Best MIG TIG Welder

Choosing a mig tig welder can feel simple until you compare power ratings, controls, and real shop needs. A machine that looks impressive online may not suit your projects. The best choice depends on what you weld, where you work, and how often the machine runs.

Start with your materials and their thickness. A home fabricator repairing steel brackets may need different settings than someone joining thin stainless panels. Check the machine’s input voltage, amperage range, and duty cycle, then compare those figures with the work you actually do. A higher maximum output is not automatically better. It can mean extra cost or features you rarely use.

Pay attention to practical details. Can you switch processes without a confusing setup? Are the torch, ground clamp, and included leads suitable for your workspace? If possible, try the controls or inspect a clear manual before buying. Small annoyances matter. A stiff cable or hard-to-read display can slow a long session.

These seven tips will help you evaluate process capability, power requirements, controls, build quality, accessories, support, and value. They are a starting point, not a promise that one model fits everyone. I’ve learned that specifications only tell part of the story; comfort and reliable local service deserve a closer look, too. Compare carefully, and choose a welder that matches your projects today without ignoring the work you may take on tomorrow.
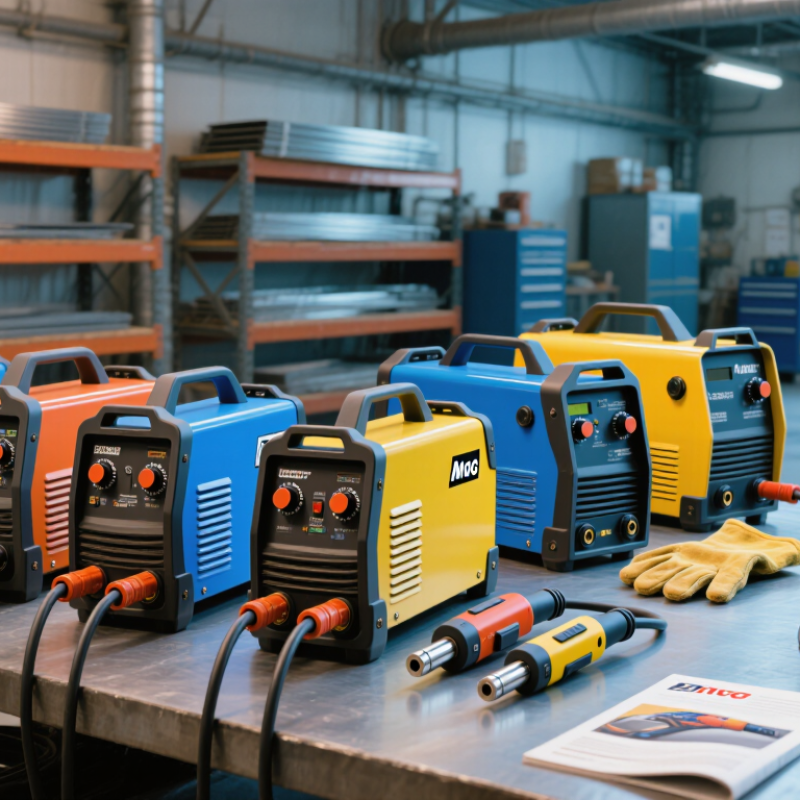
7 Tips for Choosing the Best MIG TIG Welder

Identify the Welding Tasks and Materials You Need to Handle

Before comparing machines, write down the jobs you actually expect to do. A repair bench handling mild-steel brackets has different needs from a shop building stainless food-grade frames. Note material types, thicknesses, joint shapes, and welding positions. A 1.5 mm panel can burn through quickly, while a thick trailer bracket needs deeper, consistent welds. Small details matter.

MIG welding is often practical for longer seams and routine steel fabrication, especially when speed matters. TIG offers finer control for thin sheet, stainless steel, and visible joints where a tidy bead matters. Aluminum requires suitable equipment and setup, so check the machine’s capabilities rather than assuming every welder handles it well. Also consider where you work: outdoor drafts can disrupt shielding gas, and overhead repairs demand different control than flat bench work. Thin sheet punishes heat.

Be honest about how often the machine will run and whether you can prepare clean samples for testing. Try the intended material and thickness before committing; a short bead can reveal unstable feeding, excessive spatter, or difficult heat control. I used to focus too much on maximum output, but ordinary jobs often expose a poor match sooner. The “best” process can change from one project to the next, and that is worth admitting. A machine that handles your common work reliably may matter more than one with impressive specifications you rarely use.

Compare MIG, TIG, and Multi-Process Capabilities

Compare the work each process must do, not just the machine’s feature list. MIG feeds wire continuously, making it useful for longer seams, frames, and routine repairs. With a stable setup, beginners can often produce workable beads quickly. Speed matters. Check that the machine supports the wire size and shielding gas your material requires. Thin sheet still needs careful heat control.

TIG gives more control over the weld pool and can produce neat, precise joints on thin materials. It is slower, and clean metal preparation matters; oil or rust can spoil the result. A foot pedal or torch control can help adjust heat while welding. Practice helps. If most jobs involve thick steel and long seams, TIG’s precision may not justify its slower pace.

A multi-process welder can switch between MIG, TIG, and stick welding, which is handy when projects vary. But “multi-process” does not mean every mode performs equally well. Compare amperage range, duty cycle, torch and cable compatibility, and the setup required for each process. One machine may be convenient yet less comfortable for a full day of TIG work. Check the controls in person if possible; menus can feel awkward with gloves on.

Assess Power Output, Duty Cycle, and Control Options

Power output is not a contest to find the biggest number. Match the welder’s amperage range to the metal thickness and tasks you expect. Thin sheet metal needs stable low settings; heavier sections may need more current and suitable wire or tungsten. Check the machine’s input requirements too, especially if your workshop has limited electrical capacity. Numbers can mislead.

Duty cycle tells you how long a machine can weld within a ten-minute period at a stated output before cooling. For example, a 30% rating means roughly three minutes of welding at that specified current, followed by cooling time. The rating changes with output, so compare figures at the amperage you will actually use. Short jobs may tolerate a modest duty cycle. Longer seams need more breathing room. Heat, ventilation, and how often you pause can also affect real-world use.

Control options matter when the work changes. Adjustable voltage and wire-feed speed help tune MIG welds; TIG work benefits from precise current control and, for some tasks, a foot pedal. Presets can save setup time, but they are only starting points. Test settings on scrap metal of similar thickness, then inspect the bead and adjust. It takes patience. A display may look exact, yet the arc can still feel different with another joint or material.

Check Portability, Safety Features, and Included Accessories

Tip: Check portability before focusing on output. A compact MIG/TIG welder is easier to move between a garage bench and a driveway, but weight alone can mislead. Look for a sturdy handle, a balanced grip, and clearly placed controls. For outdoor work, check the manual’s input and extension-cord guidance. A light machine is useless if safe power cannot reach the work.

Tip: Inspect safety features closely. Thermal overload protection can pause operation when the unit gets too hot, while a cooling fan helps manage heat during longer sessions. Check that the case, cables, and connectors are undamaged and fit securely. Wear suitable eye and hand protection, and keep the work area clear of flammable materials. Safety is practical, not decorative.

Tip: Compare included accessories with your actual jobs. A torch, ground clamp, regulator, and consumables can reduce extra purchases, but included parts may not suit every material or process. Check the manual for compatibility and replacement sizes. It is easy to assume a full box means a ready-to-weld setup; sometimes a useful lead or adapter is still missing. Make a short checklist before buying.

7 Tips for Choosing the Best MIG TIG Welder - Check Portability, Safety Features, and Included Accessories

# Tip What to Check Why It Matters
1 Match the processes to your projects Confirm which processes the machine supports, such as MIG, flux-cored wire welding, and TIG. Check whether TIG is DC lift-start or AC/DC TIG. Process names alone do not tell you the machine’s capabilities. AC TIG is generally needed for TIG welding aluminum, while DC TIG is commonly used for steel and stainless steel.
2 Check input power and output range Review the required supply voltage, rated current, and available output range. Make sure the workshop circuit and outlet meet the manufacturer’s electrical requirements. A welder’s usable output depends on its power supply. Confirming compatibility before purchase helps avoid installation problems and limits on the work you can do.
3 Compare duty-cycle ratings Check the duty cycle at the stated amperage and voltage, and note the test period and rating standard shown in the manual or product specifications. Duty cycle describes how long a machine can weld within a specified period before needing to cool. Ratings at different output levels are not directly comparable.
4 Assess portability for your workspace Compare the unit’s weight and dimensions, handle or wheel design, and the length of its power lead, torch, and work clamp leads. A compact machine may be easier to move, but lead reach and access to a suitable power source also affect how conveniently it can be used on site or in a workshop.
5 Verify safety features and protections Look for clearly documented thermal overload protection and follow the manual’s requirements for grounding, ventilation, and electrical supply. Use a correctly rated welding helmet, gloves, and protective clothing. Thermal protection can help prevent damage from overheating; it does not replace safe operating practices or suitable personal protective equipment.
6 Inspect the included accessories Check the package list for the MIG torch, work clamp and lead, gas hose or regulator, TIG torch and consumables, and any wire-feed components. Confirm whether shielding gas, filler material, and a spool gun are excluded. Included equipment varies. TIG requires a suitable torch and shielding-gas setup, while MIG setups may need a gas supply or compatible flux-cored wire depending on the process.
7 Check controls, consumables, and support Review how wire speed, voltage, and TIG current are adjusted; confirm compatibility with common wire sizes and torch consumables; and check the availability of the manual, warranty, and service support. Clear controls and accessible compatible parts can make setup and routine maintenance easier. A detailed manual helps users follow the correct setup and safety instructions.

Balance Your Budget with Skill Level and Long-Term Support

Choosing a MIG/TIG welder is not just a price comparison. Your budget should match the work you can confidently do today, while leaving room to grow. A low-cost machine may suit occasional repairs, but check its duty cycle, input power, and included torch before buying. These details affect whether it can handle repeated beads or thicker material without long cooling breaks. Set aside money for a quality helmet, gloves, gas, and consumables. The machine is only part of the bill. Small costs add up.

Skill level matters just as much. MIG is often easier to learn for basic shop projects, while TIG requires steadier coordination and more setup. If you are new, adjustable controls and a clear manual may be more useful than advanced features you rarely touch. Try a short practice session on scrap steel, if possible, before choosing. That matters. Long-term support deserves a place in your budget, too: check for accessible manuals, replacement parts, and responsive technical help. A cheap welder that is difficult to service can mean costly downtime. It is easy to overvalue advertised features; I would revisit that assumption after a few projects and spend where experience shows a real gap.

7 Tips for Choosing the Best MIG/TIG Welder

Balance your budget with your skill level and long-term support.

Practical planning ratings from 1 (lower priority) to 5 (higher priority), not survey results. Compare total cost, process compatibility, duty cycle, power needs, consumables, and available support against your experience and projects.